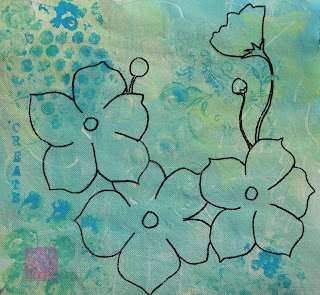
Working canvas with step two completed.
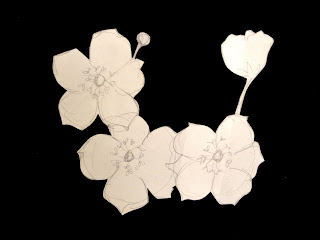
To do this, first I cut a piece of paper the same size as my working canvas. Then I made a sketch of the image I wanted as my focal point, in this case flowers. Then I cut out my image (the black is just the background I photographed my paper flowers on). I arranged my paper image on the canvas and traced around it with pencil. Then I went over the pencil with black permanent marker.
I have to confess that I couldn't quite leave step one alone. Before I started step two I added some rubber stamped images including letter stamps. I promise you won't have to wait very long for step three!
 Working canvas with step two completed.
 To do this, first I cut a piece of paper the same size as my working canvas. Then I made a sketch of the image I wanted as my focal point, in this case flowers. Then I cut out my image (the black is just the background I photographed my paper flowers on). I arranged my paper image on the canvas and traced around it with pencil. Then I went over the pencil with black permanent marker.
1 comment:
I hope I don't have to wait long for step three - it is nice to see you posting again. Carolina
Post a Comment